You have seen these a lot in the last few days. Coin purses. Perfect for change, lipstick or other little necessities. And here's how you can make your own in lengthy detail.
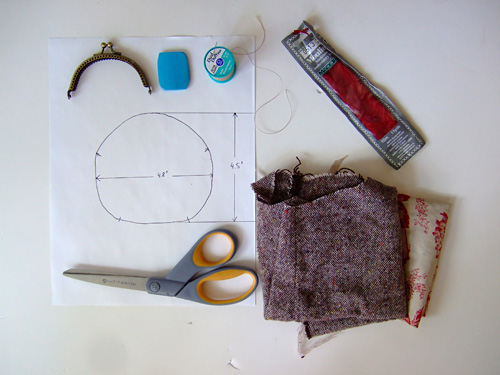
Supplies:
- free pattern (download here)
- curved sew-on purse frame 3.3/8 inches or 8.5 cm
- fabric for shell and lining
- scissors
- fabric marker
- needle
- thread
- embroidery thread (optional)
- embroidery thread (optional)
Make:
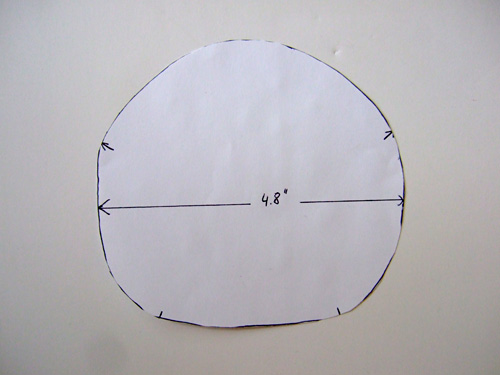
Cut out pattern from free downloadable pdf.
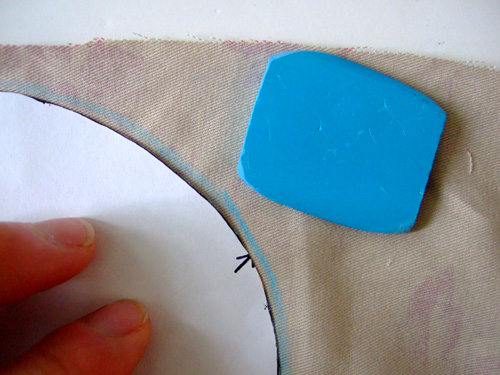
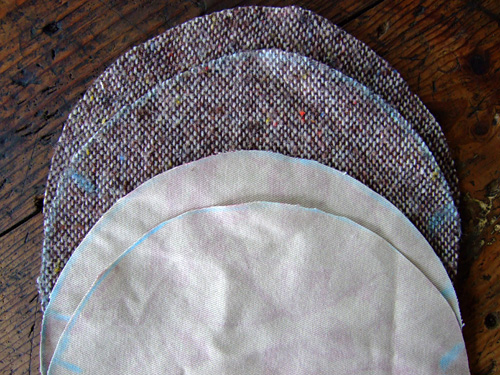
Cut out 2 pieces for outer shell and 2 for lining.
Remember to transfer the markings from the pattern as well.
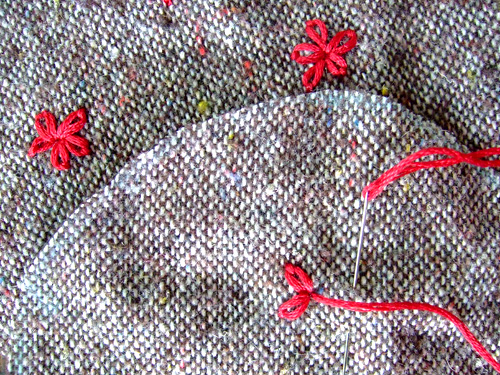
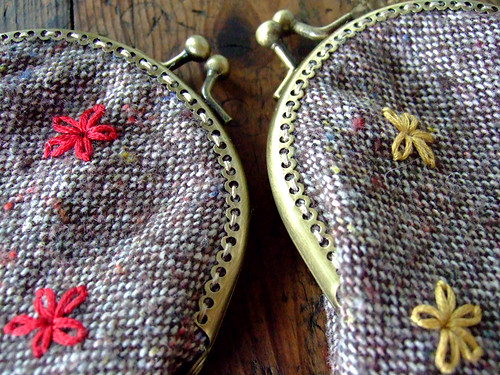
Embroider or print or embellish the outer shell any way your like. (Optional)
You can also use interesting printed fabric as your base and skip embellishment.
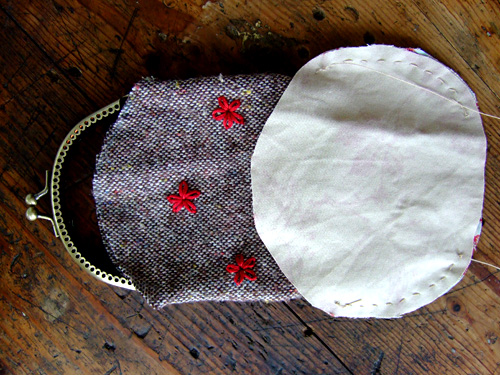
The tweed above is from recycled trousers. They needed a little something extra.

Place the right sides together. The blue/black lines are markers to show the opening for the frame.
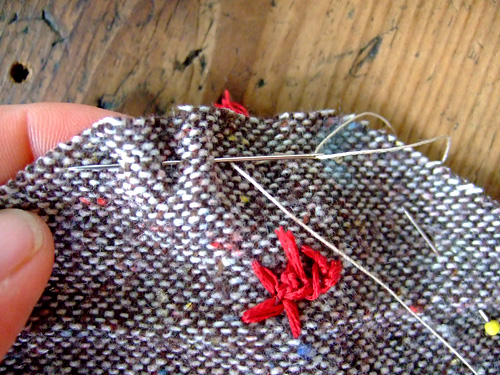
Use a simple running stitch and leave the marked top curved part open. (This is where the purse frame will be attached.) You can also use a backstitch.
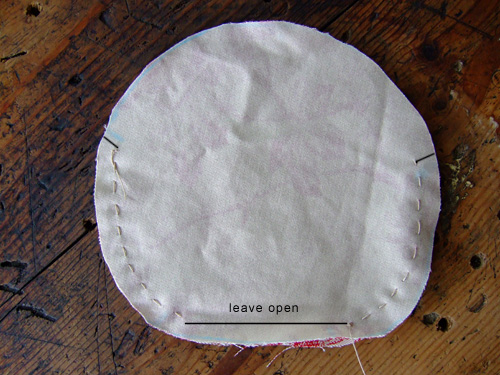
Do the same with the lining, leaving the top curved part open and the bottom part as well.
I always leave a long thread which can then be used to attach the lining, though you don't have to.
The bottom opening is used for turning the purse inside out. (You'll see that step later.)
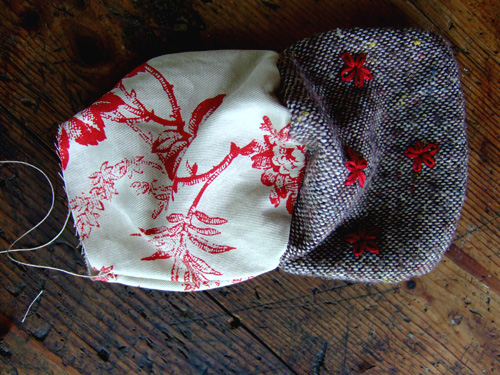
Place the outer shell right side out into the lining. (with the stitching on the outside).
This is how it looks. Now attach the lining to the outer shell.
Use the same thread you sewed the lining with or start a new one.
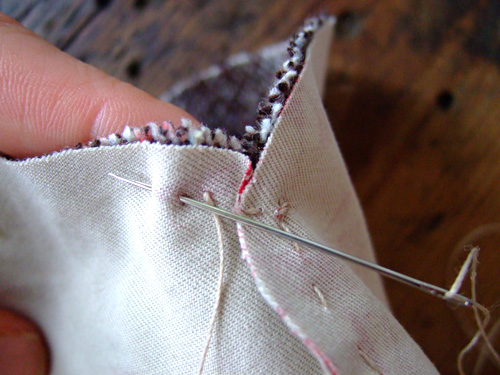
Stitch all the way around the upper curved part. The start is pictured above.
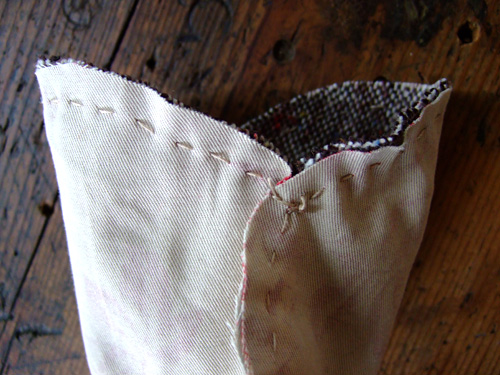
The side seams of the lining are folded to one side, the outer shell to the other side.
Time to turn the purse inside out.
Push the outer part through the opening in the lining.
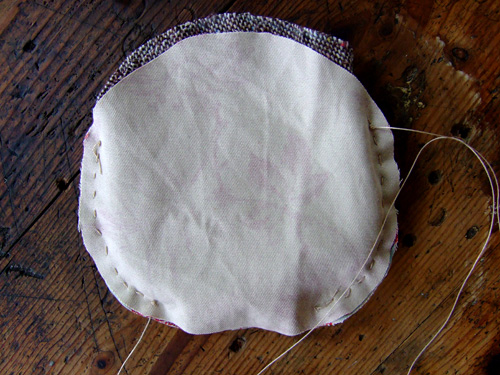
Close the opening in the lining. A slip stitch will work.
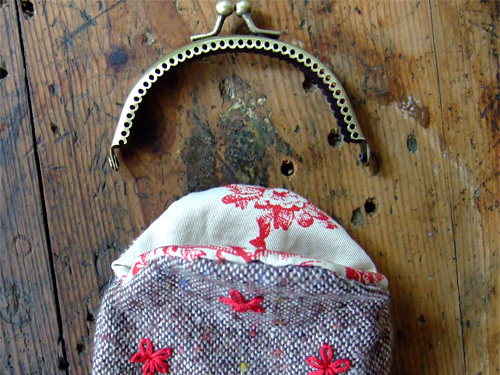
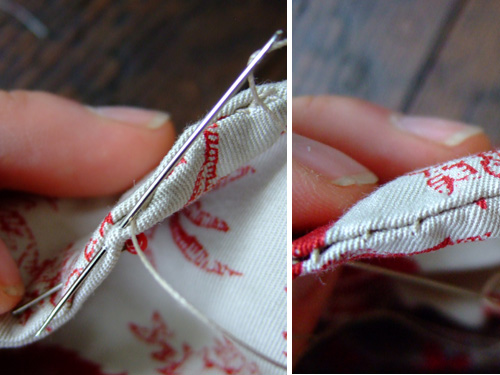
Time to attach the frame.
If you are a beginner I would recommend using a bit of glue to hold the frame in place while you sew it on.
You can also finish the purse at this stage, by permanently attaching the frame with adhesive.
This can be done by placing a line of glue onto the curved edge and gluing the frame in place.
If you prefer sewing, read on.
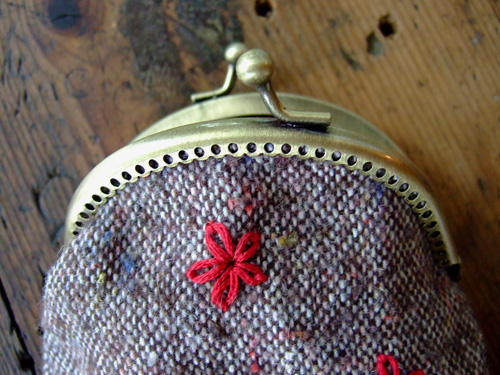
This is how it would look, if you glued it in place.
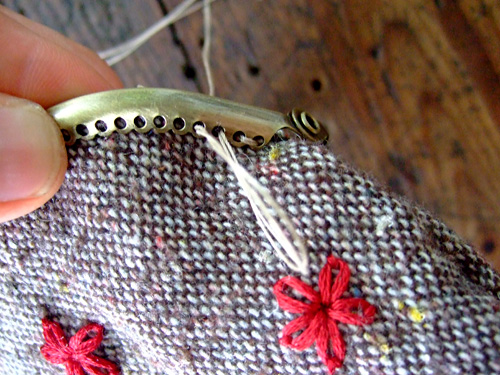
Double your thread and stitch through the holes grabbing the fabric to attach the frame.
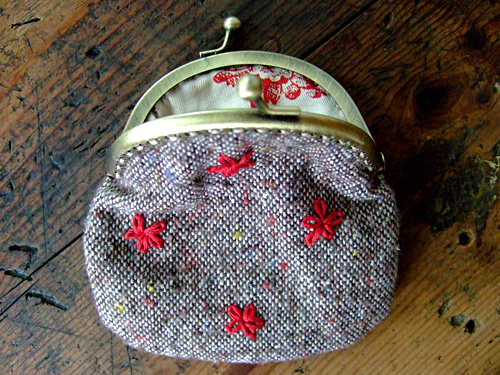
Voila, a framed coin purse.
If you have any questions, no matter how simple or mundane, please don't be shy and email me! It's important for my learning to understand what the difficult areas are and how I can present them better. This technique can be used to sew any lined bag by hand.
It takes about 1 hour to 1.5 hours if you don't embroider anything too complicated. The first time might take longer. The sew on frames are available from several etsy sellers and ebay as well. Sadly, there seems to be no American company producing these frames. So I order from ebay and get them in larger quantities as they make a perfect gift for many occasions.
It's Friday, late summer and the county fair is in town....have a good weekend!
Thanks for the tip about the frames- they really are adorable. Love your work and have a great day!
ReplyDeleteWhat a wonderful tutorial! I can't wait to try one out. Once I find some frames I'm definitely going to give it a try! Thank you so much for sharing. :)
ReplyDeleteMuito bem explicado!
ReplyDeletehow nice!thank you
ReplyDeleteThe lining of that purse makes it even cuter that ever! Thank you for the tutorial. My only question was going to be about where to find the purse frames. I love how the stitching adds to the finishing detail of the purse.
ReplyDeleteis so so beuatifull, thank you for the tutorial!!!!!
ReplyDeletenow i go to etsy to search someframes!!!
Here's a supplier I just found on etsy. Their frames look really nice. (The supplier I had ordered from in the past doesn't carry these right now.)
ReplyDeletehttp://www.etsy.com/shop/bagpurseframes
Hope this helps.
what a great tutorial! enjoy the faire and your weekend...
ReplyDeleteQuedan preciosos! Y muy bueno el paso a paso!
ReplyDeleteBesos, y buen fin de semana,
Sandra
Excellent tutorial.
ReplyDeleteI'm guessing that the frame's measure is taken accross, one straight line from one end to the other. How much bigger than the frame is your fabric? 1 inch? And you could probably find old coin purses to deconstruct at second-hand stores...
Sophie
thank you.. i usually am not the handy person that would do something, but I will try this one!
ReplyDeletehave a great weekend!
You have one fine blog. I am so glad to read. I found you through my friend Diane over at Mackville Road.
ReplyDeleteI am putting you in my favorites to read more over tea tonight! Yay!
.. my comment read back funny..
ReplyDeleteI mean to read while sipping tea later on tonight ( when the littles are asleep! :)
Yay! I was hoping you might be so kind as to do tutorial on these sweet purses :)
ReplyDeleteThank you, thank you, thank you....
(gasp)
ReplyDeleteFINALLY! Information on where to get those frames ::shakes fist of anger::. I always wondered where people were buying them but never saw them in stores. Such a mystery! That--and I hadn't a clue how you attached those darn things.
Thank you for the awesome creation! Now we have a perfect place to hide away all our gold bullion. What? You don't have any? (^_~)
thanks a lot! I like your blog very much...
ReplyDeleteAggy from Rome
Your blog is so beautiful, I'm glad I found you! We share many things in common (history of fashion one of them :-) . I just made an order of purse frames from your same supplier and some from Gina Purse too, and I can't wait to make some purses my self, I simply adore them, so thanks for the tutorial! Silvia
ReplyDeleteWow!! These are so cute!! And the tutorial is so clear - I think even I might be able to make one of these with your help :) Thanks for sharing!!
ReplyDeleteThank you so much for sharing a tutorial on this.
ReplyDeleteI wanted to try to make one for so long but always thought it would be to difficult. Now I'll definitively give it a try.
What a great idea! Just wanted to let you know that I work for Jo-Ann Fabrics and we sell these frames now too!
ReplyDeletethese are so precious!
ReplyDeletewhat sort of thread did you use to attach the frame? It looks like embroidery floss, but I always have a hard time stitching with that because it's so thick.
@Cindy: Thanks so much for letting us know.
ReplyDelete@katie bee: I use Coats & Clark buttonhole thread; doubled, so the purse will never ever break ;). I use button hole thread a lot and it's very easy to use. It's cotton covered polyester thread and while I'm not a fan of polyester, it does add strength to everything you sew. I don't recommend using embroidery floss for any seam, or where strength is required.
Your tutorial looks great! I love making purses but till now I've only used zips. I am very excited to try and make one so I hope I can get a frame and some time soon to try. Have you ever made a zip purse with felt?
ReplyDeletehi annekata, i actually meant to ask have you ever made any of your coin purses with felt...and yes I only hand sew everything including my quilts so they take me years to make...but I'm not in a hurry so I don't mind!
ReplyDeleteI haven't sewn in too much time, and this easy and fun tutorial just made me want to bring out the fabrics again. Thanks for sharing!
ReplyDeleteMerci ! ^^
ReplyDeleteOh, fantastic! I've been looking for a clear tutorial on sewing purse frames. I've tried the glue in kind and just find no success with them, so I'm real happy to see this. I'll have to try it out and blog about the results. :)
ReplyDeleteYes, these frames are sold at Joann's...I just bought 2!
ReplyDeletenice purse i'll try it a day
ReplyDeleteWhat is the seam allowance you used for the stitch?
ReplyDelete@Paula: I used 1/2" to 3/8". It doesn't have to be completely exact. Hope this helps.
ReplyDeleteThe fabric and frame are beautiful. I am currently obsessed with metal framed purses too. Please check out the ones I've made @ http://mspiggii.blogspot.com/
ReplyDeleteThanks
Love your blog and loved the coin purse so much I finally used the one I had been going to use for a crocheted coin purse. I used an vintage piece of material with different scences from the material on each side, one of flowers and the other of birds with trees. I used a soft cotton for liner. I love how it turned out! and am happy I found your tutorial it was easy to follow. I am now going to order more frames these could become addictive.
ReplyDeleteThanks for your really clear tutorial! I've had a purse clasp with the sew on holes for a while and haven't been able to find a suitable tutorial till now - will certainly be giving this a go later!
ReplyDeleteMuch love,
Kim
It's my best day ever!I've found this tutorial!! THANK YOU SO MUCH!!!!! =)
ReplyDeleteLots of hugs from Hungary!
Cecilia
Thank you so much! I am excited to try this. I have a most favourite little coin purse and am complimented all the time. I'll be making these for gifts. Shall I send you a picture?
ReplyDeleteXOXO
~C.
YOUR TUTORIALS ARE SIMPLY WONDERFUL. VERY CLEAR AND CONCISE AND EASY TO FOLLOW .. FANTASTIC PHOTOS SHOWING EVERY STEP OF THE WAY! THANKS SO MUCH FOR SHARING!!!! frannie
ReplyDelete