
What does Greta Garbo have to do with annekata? Nothing, really....except, we wear similar hats. And if you want to look like Greta this winter, here's a little holiday gift. Make you very own "Garbo Hat". To finish it off, just add some red lipstick. (To the lips, not the hat.)
This hat can be easily sewn in an afternoon without a sewing machine. Don't mind the washed out quality of the images below. Let's pretend I used some old color film which was stored in a cupboard for 50 years. As always, this tutorial is oriented toward exploration and experimentation and not a fixed recipe. The measurements will change according to your preferences.
Supplies:
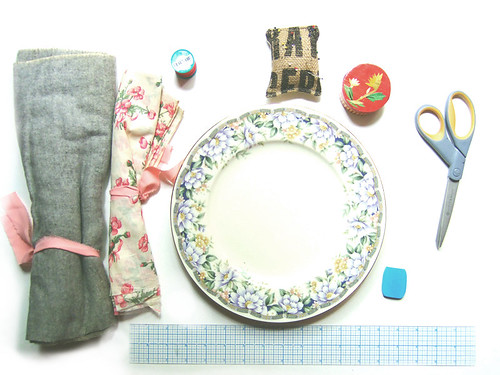
- fabric (felt is good, old wool coats, t-shirt, once you get the hang of it, or linen for warm weather)
- a dinner plate (approx. 12 inches, depending how big your hat should be.)
- tailor's chalk
- scissors
- pins
- needles and strong thread
These instructions are for an unlined hat. I'll add the lining steps later this week.
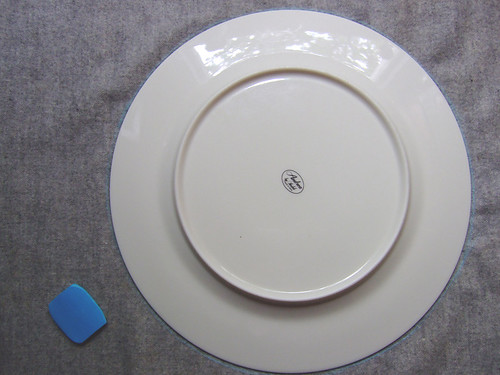
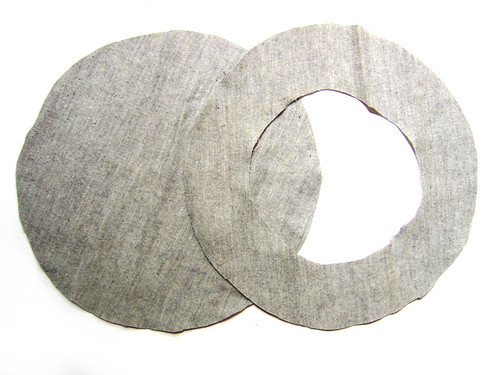
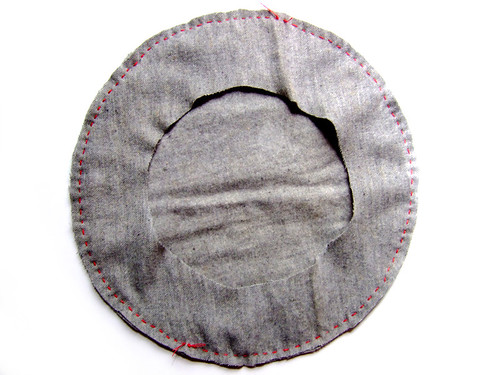
First trace the plate onto the fabric and repeat, so you have two circles. Cut a donut hole from in one of them of 6 - 6.5 diameter (depending how big your head is). Start small, you can always make the opening bigger. Try the "donut" on for size. Don't worry, you are not trying to look like Greta yet.
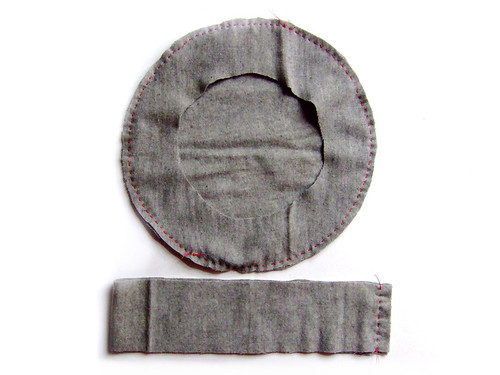
Measure around your head (where the hat will sit) and cut a band your measured length plus 0.4 inch seam allowance, approx 3.5 inches wide.
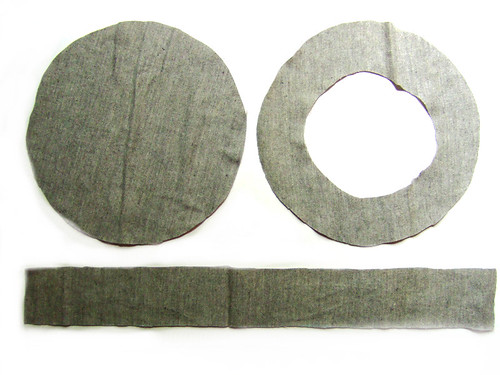
These are all the pieces needed to make the hat above.
Pin and sew the two circles together. Felt has no right or wrong side. If you use printed fabric, place the right sides together. Sew completely around the circles, as shown below.
Sew the two ends of the band together, right side on right side (if applicable).
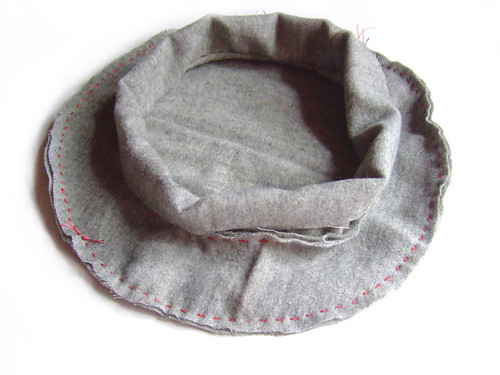
Last thing to attach is the band. Take a look at the picture below. First pin one side of the band into the opening (right side on right side) of the circle by selecting two opposite points, pulling them and then pinning them. Repeat on the perpendicular points and pin so the band is attached at four points. Finish pinning by adjusting the band into the opening. This can be a bit tricky depending on the fabric you use. Relax. As long as the headband is wide enough, the hat will fit.
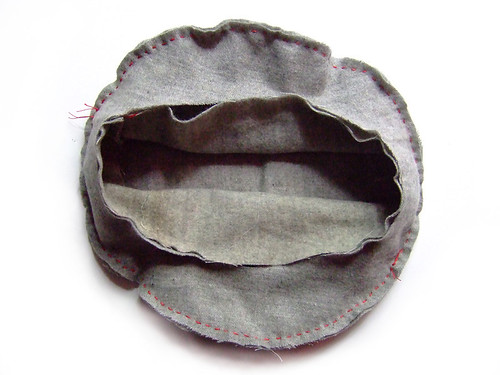
Sew the band into place. It'll look like this:
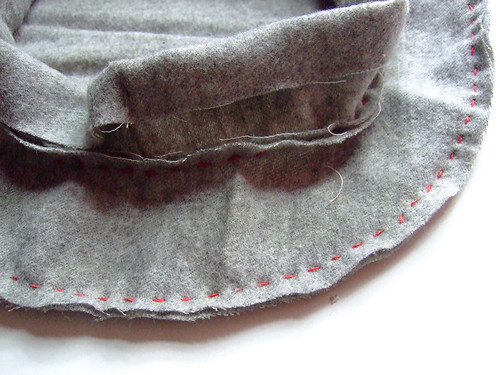
The only thing left, is to fold the band over and sewing it over the seam. I have no good image of this, because, after all, I'm on vacation, but once you are at this stage, it's obvious.
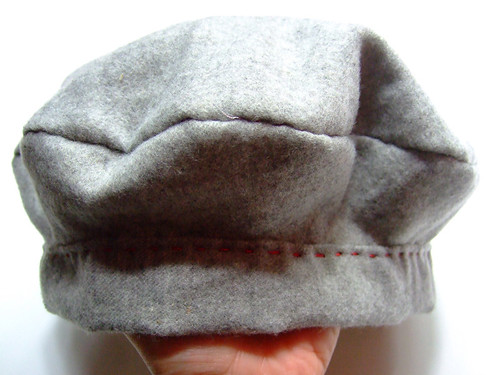
Turn inside out and voila, it's ready. I top stitched the upper seam with a red running stitch, because it keeps it nice a flat and I like how it looks.
This hat is my daughter's and the softest wool ever. The plate I used was 11 inches, which makes the hat a bit smaller. The step toward a lined hat is really easy and makes the hat reversible. The band has to be a bit narrower and you stop before folding over the band to finish the hat. I'll have the pictures later this week.
As usual: experiment. There are a million variation to make these.
great idea! I am making hats from fleece left over from jackets I've made. I start with a circle as well, and then add two bands below, the last one as a cuff. I'll have to post about it. But I hadn't thought to make one like this.
ReplyDeleteChristmas greetings from NJ
What a great hat - looks brilliant!! (Am liking the Greta Garbo hat look-a-like picture.)
ReplyDeleteLove this! Easy and chic!
ReplyDeletePerfect! Time to start scoping out the right fabric.
ReplyDeleteBlessings and light...
I may have to make one of these for myself in the New Year. Thanks!
ReplyDeleteCute! I haven't been able to find a hat I like to go with my red fleece vest and scarf, so I might just have to take matters into my own hands! I know I've got some red fleece left over from a quilt back - hopefully it's enough! :)
ReplyDeleteThank you, thank you, thank you...I can't wait to begin! I wish you and your family a bright and happy Holiday Season!
ReplyDeleteWow, thank you so much!
ReplyDeleteI will be sure to perform a good deed to circulate your generosity.
Thank you a lot for this lovely christmas surprise! Such a nice hat!
ReplyDeleteSo my handy won't have any chance to be lazy these holidays! Thank you so much!
so fun! you look fantastic in a hat!
ReplyDeleteYay!! Great job. I wore a lot of hats in high school but stopped come college (I'm sure moving to sunny Southern California affected that). I wonder how this style would look on me.
ReplyDeleteThanks for the clear and inspiring instructions!
Truly Lovely.
ReplyDeleteWishing you a Merry and Bright Christmas.
Elise
Made a quick Garbo hat last night to tuck into one daughter's stocking...she loved it, and is wearing it right now! Her sisters (24 and 21, who will each be getting one) say it looks very "Anne Hathaway"...
ReplyDeleteI must say..!! I love your blog and sooo happy I found you. Your ideas are wonderful and so informative. Thank you and now to start!!!
ReplyDeleteHow I love people who share their genius. Thank you, thank you. How much fun I am going to have!
ReplyDeletecool! This makes it seem really doable and not at all intimidating.
ReplyDeleteThank you!
www.stitchingincircles.blogspot.com
I love this project. I need this hat for this winter! :)
ReplyDeleteI linked you in my blog, I hope you don't mind.
http://licenciaparacoser.blogspot.com
Thanks for sharing.
Ana
I love this pattern, it's so perfect, I've recommended it to other sewists, too. Thank you for sharing it with us.
ReplyDelete